DIY EYEBROW TINTING // IT'S EASIER THAN YOU THINK!

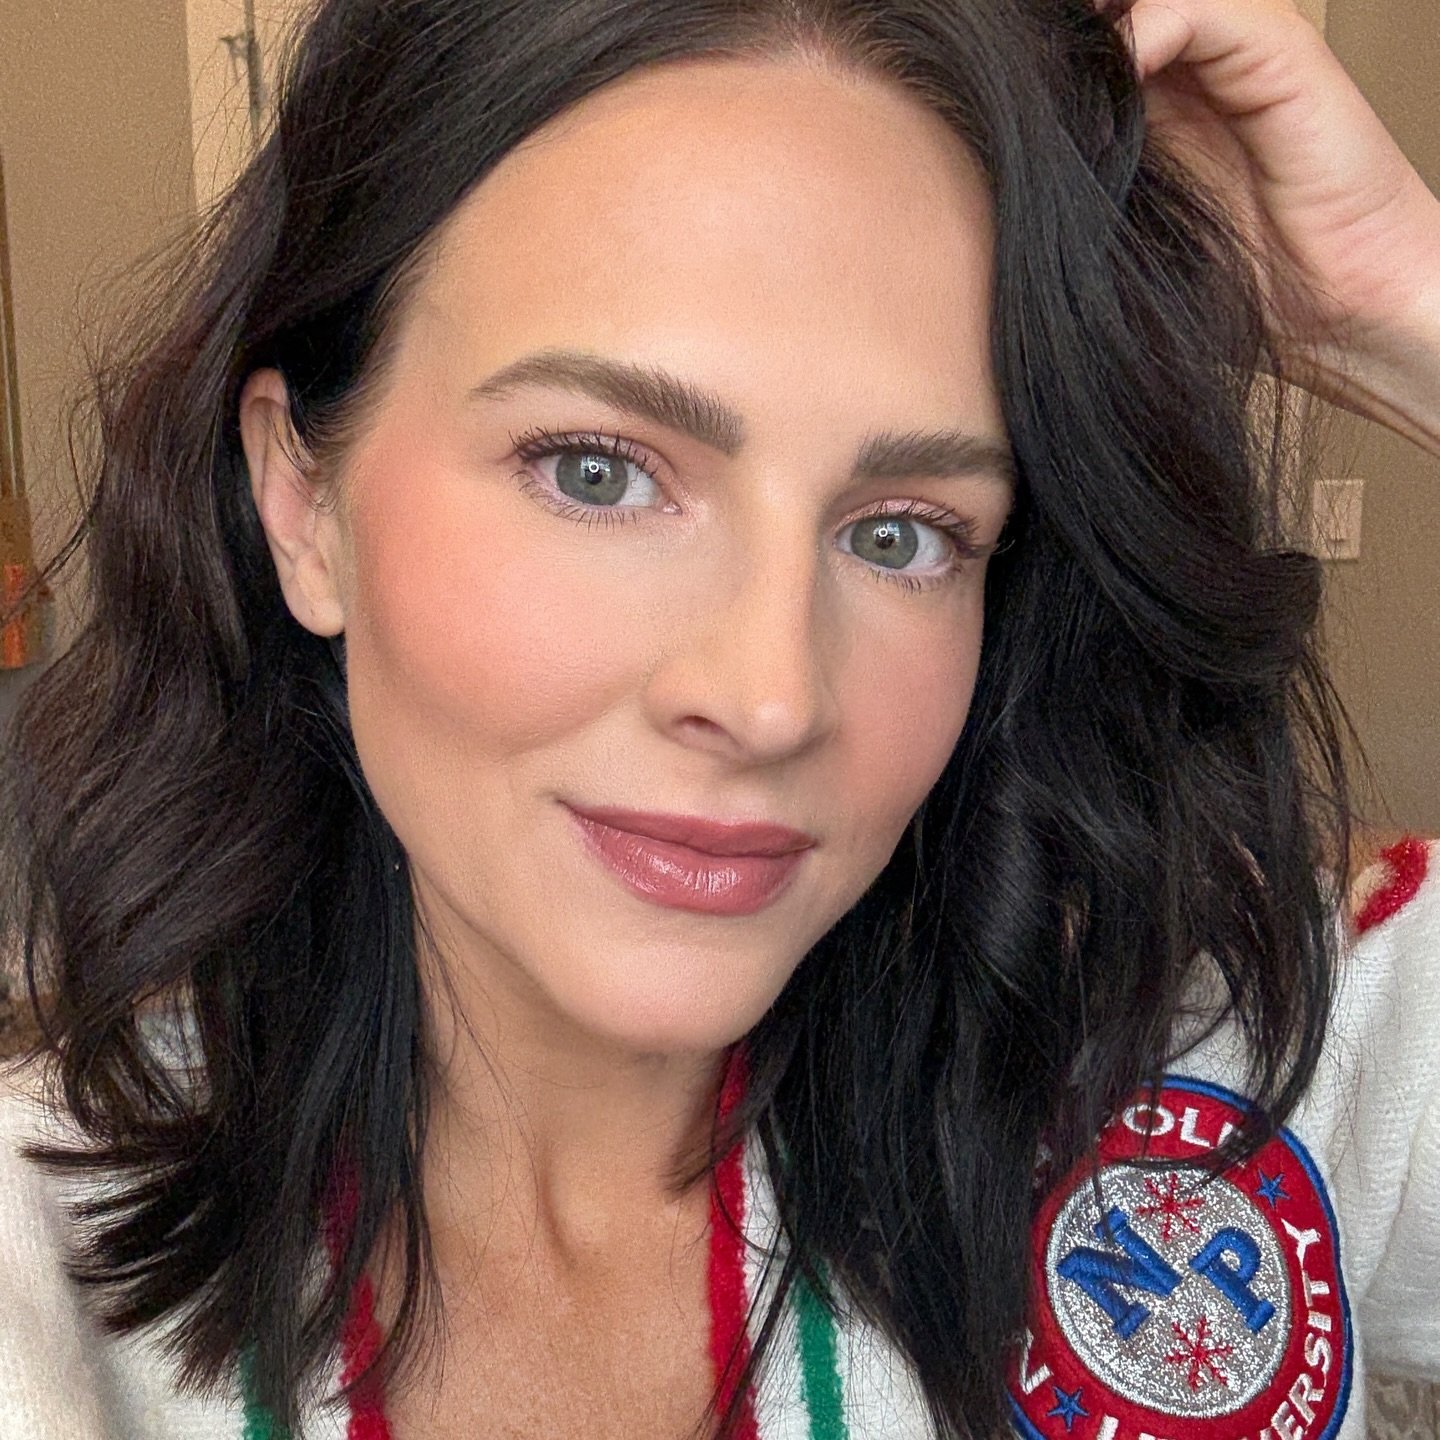
Eyebrows have really taken center stage in the beauty world over the last few years. And I for one have LOVED seeing them become such a huge piece of the puzzle... after all they are literally the 'frame' around the 'window to your soul'! That's a bold statement- but hey, it's true!

I first began tinting my eyebrows during my time in beauty school, and I realized what a life changing experience it can be, especially for fellow blondies like myself. And while a professional tint and wax is always a great way to liven up your features- it's not always in the cards to pay to have that service done at the salon.

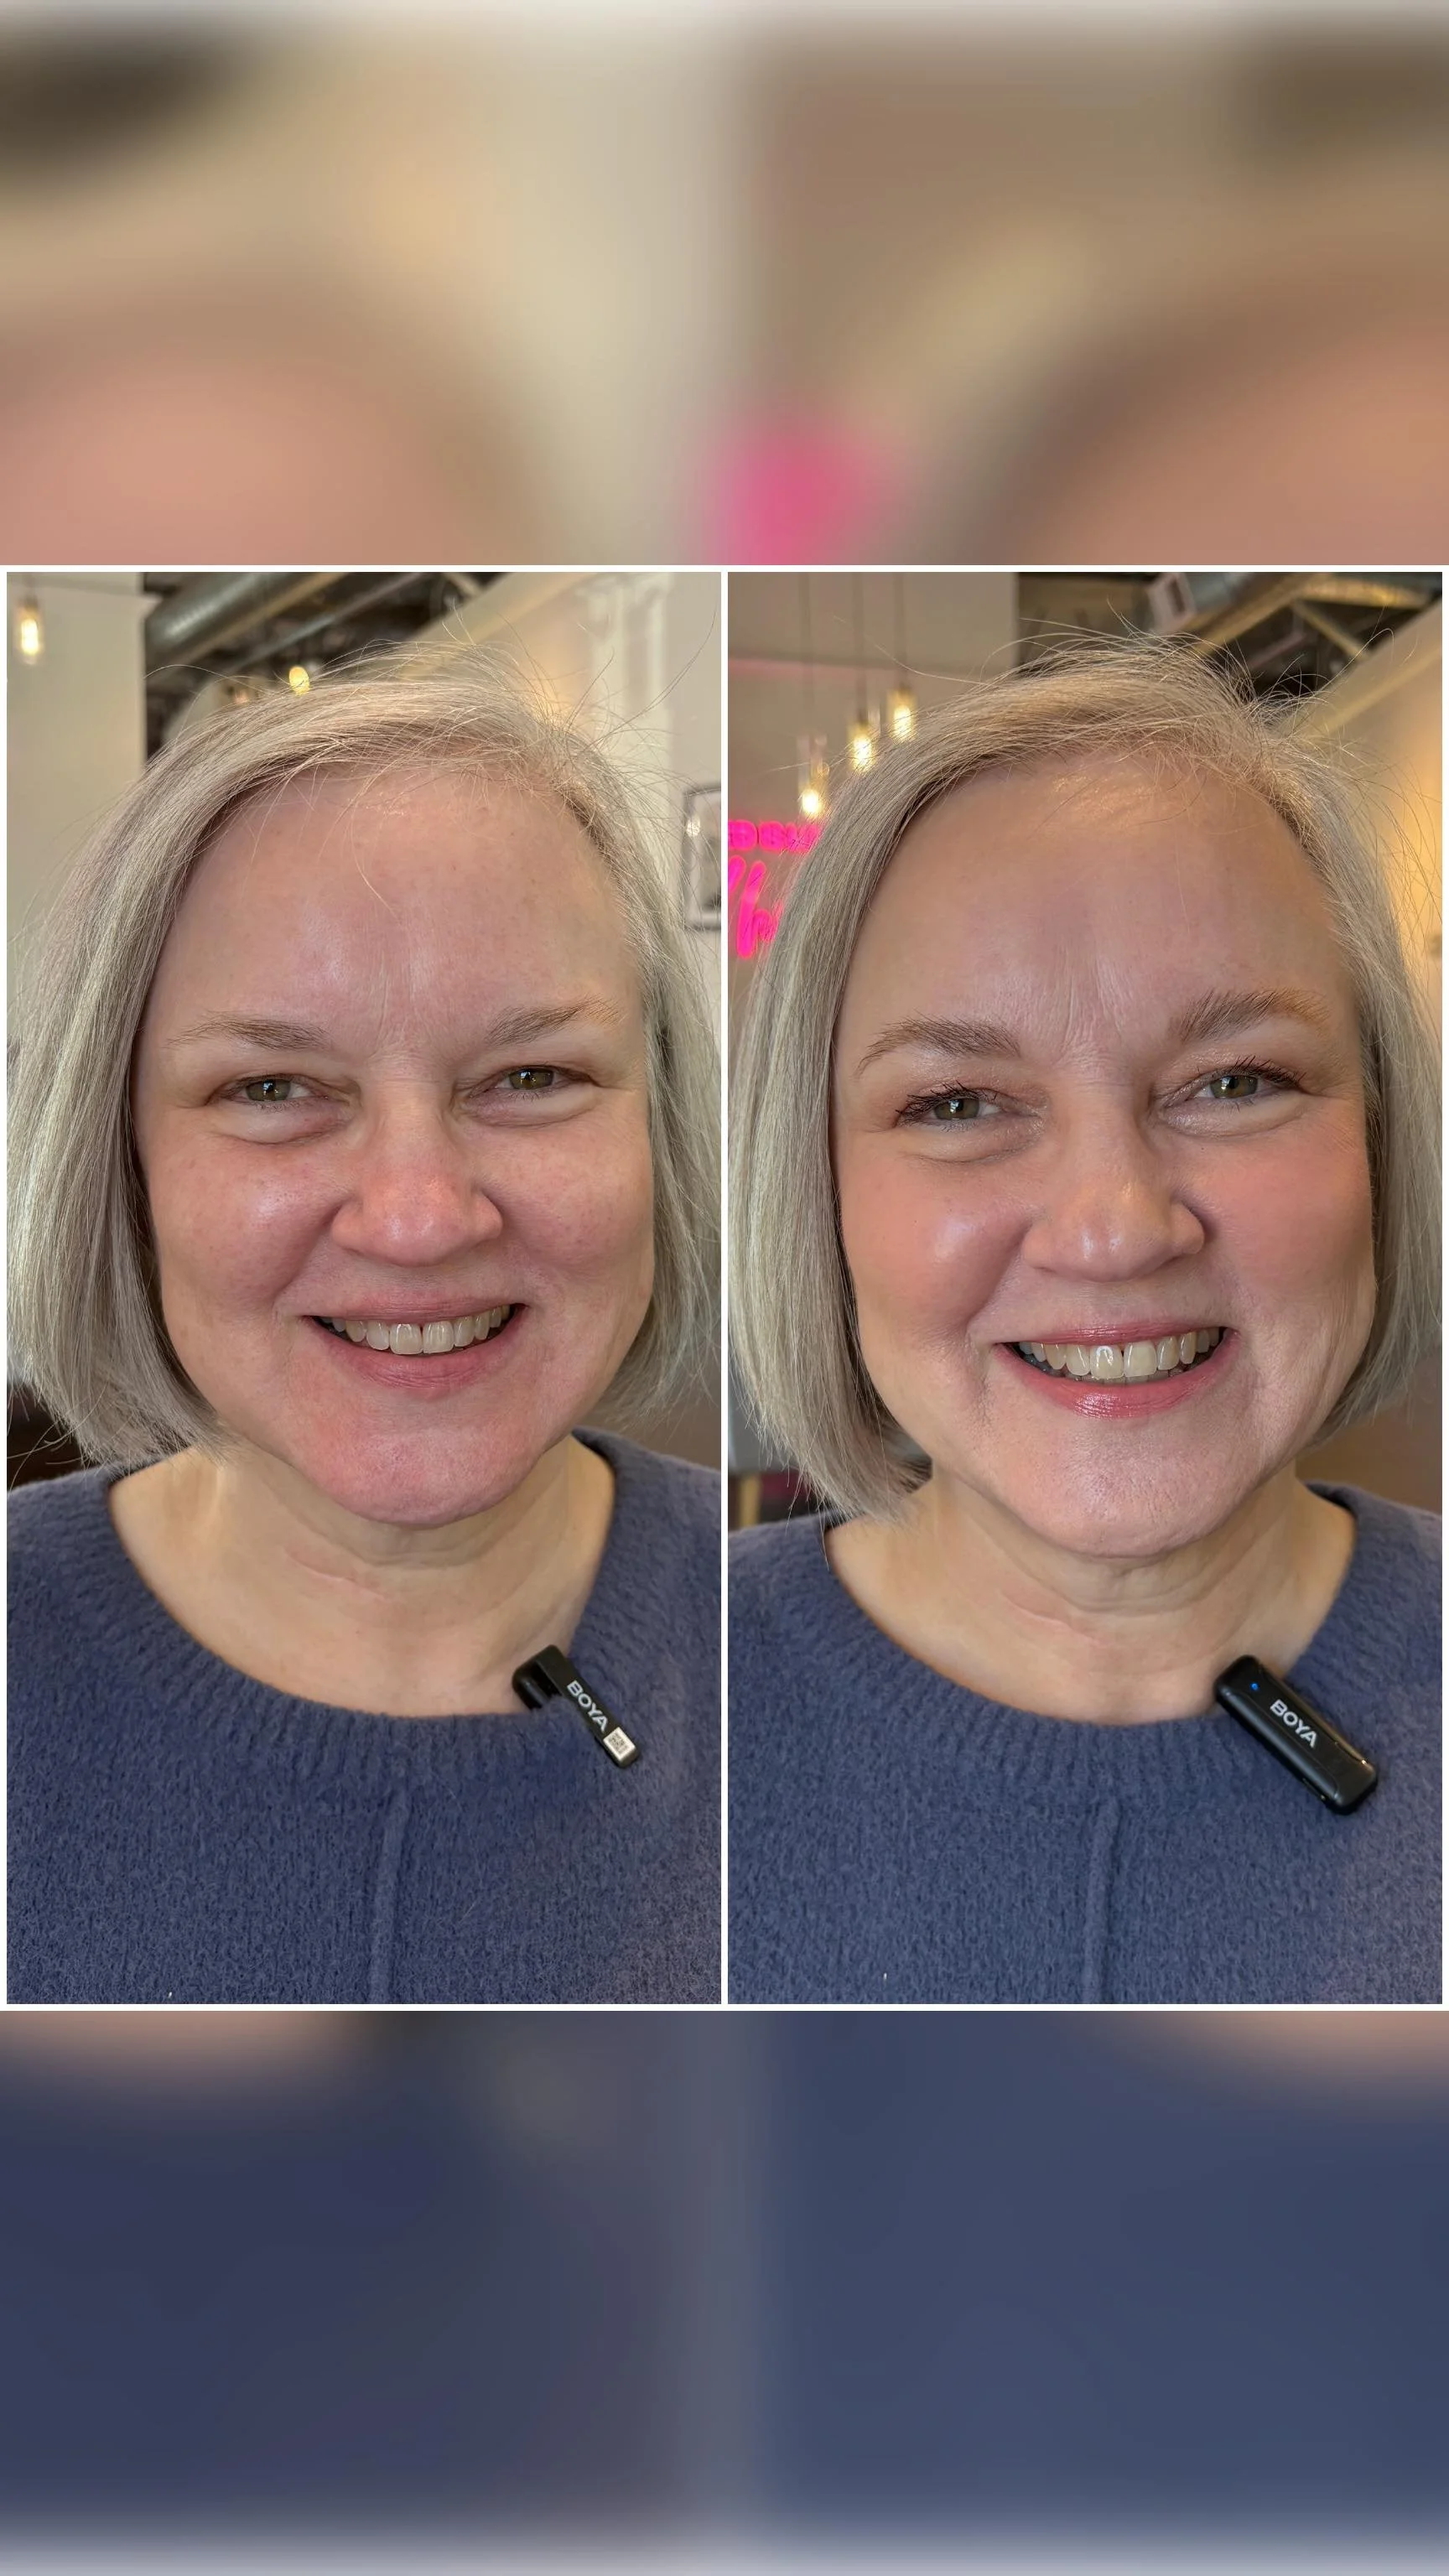
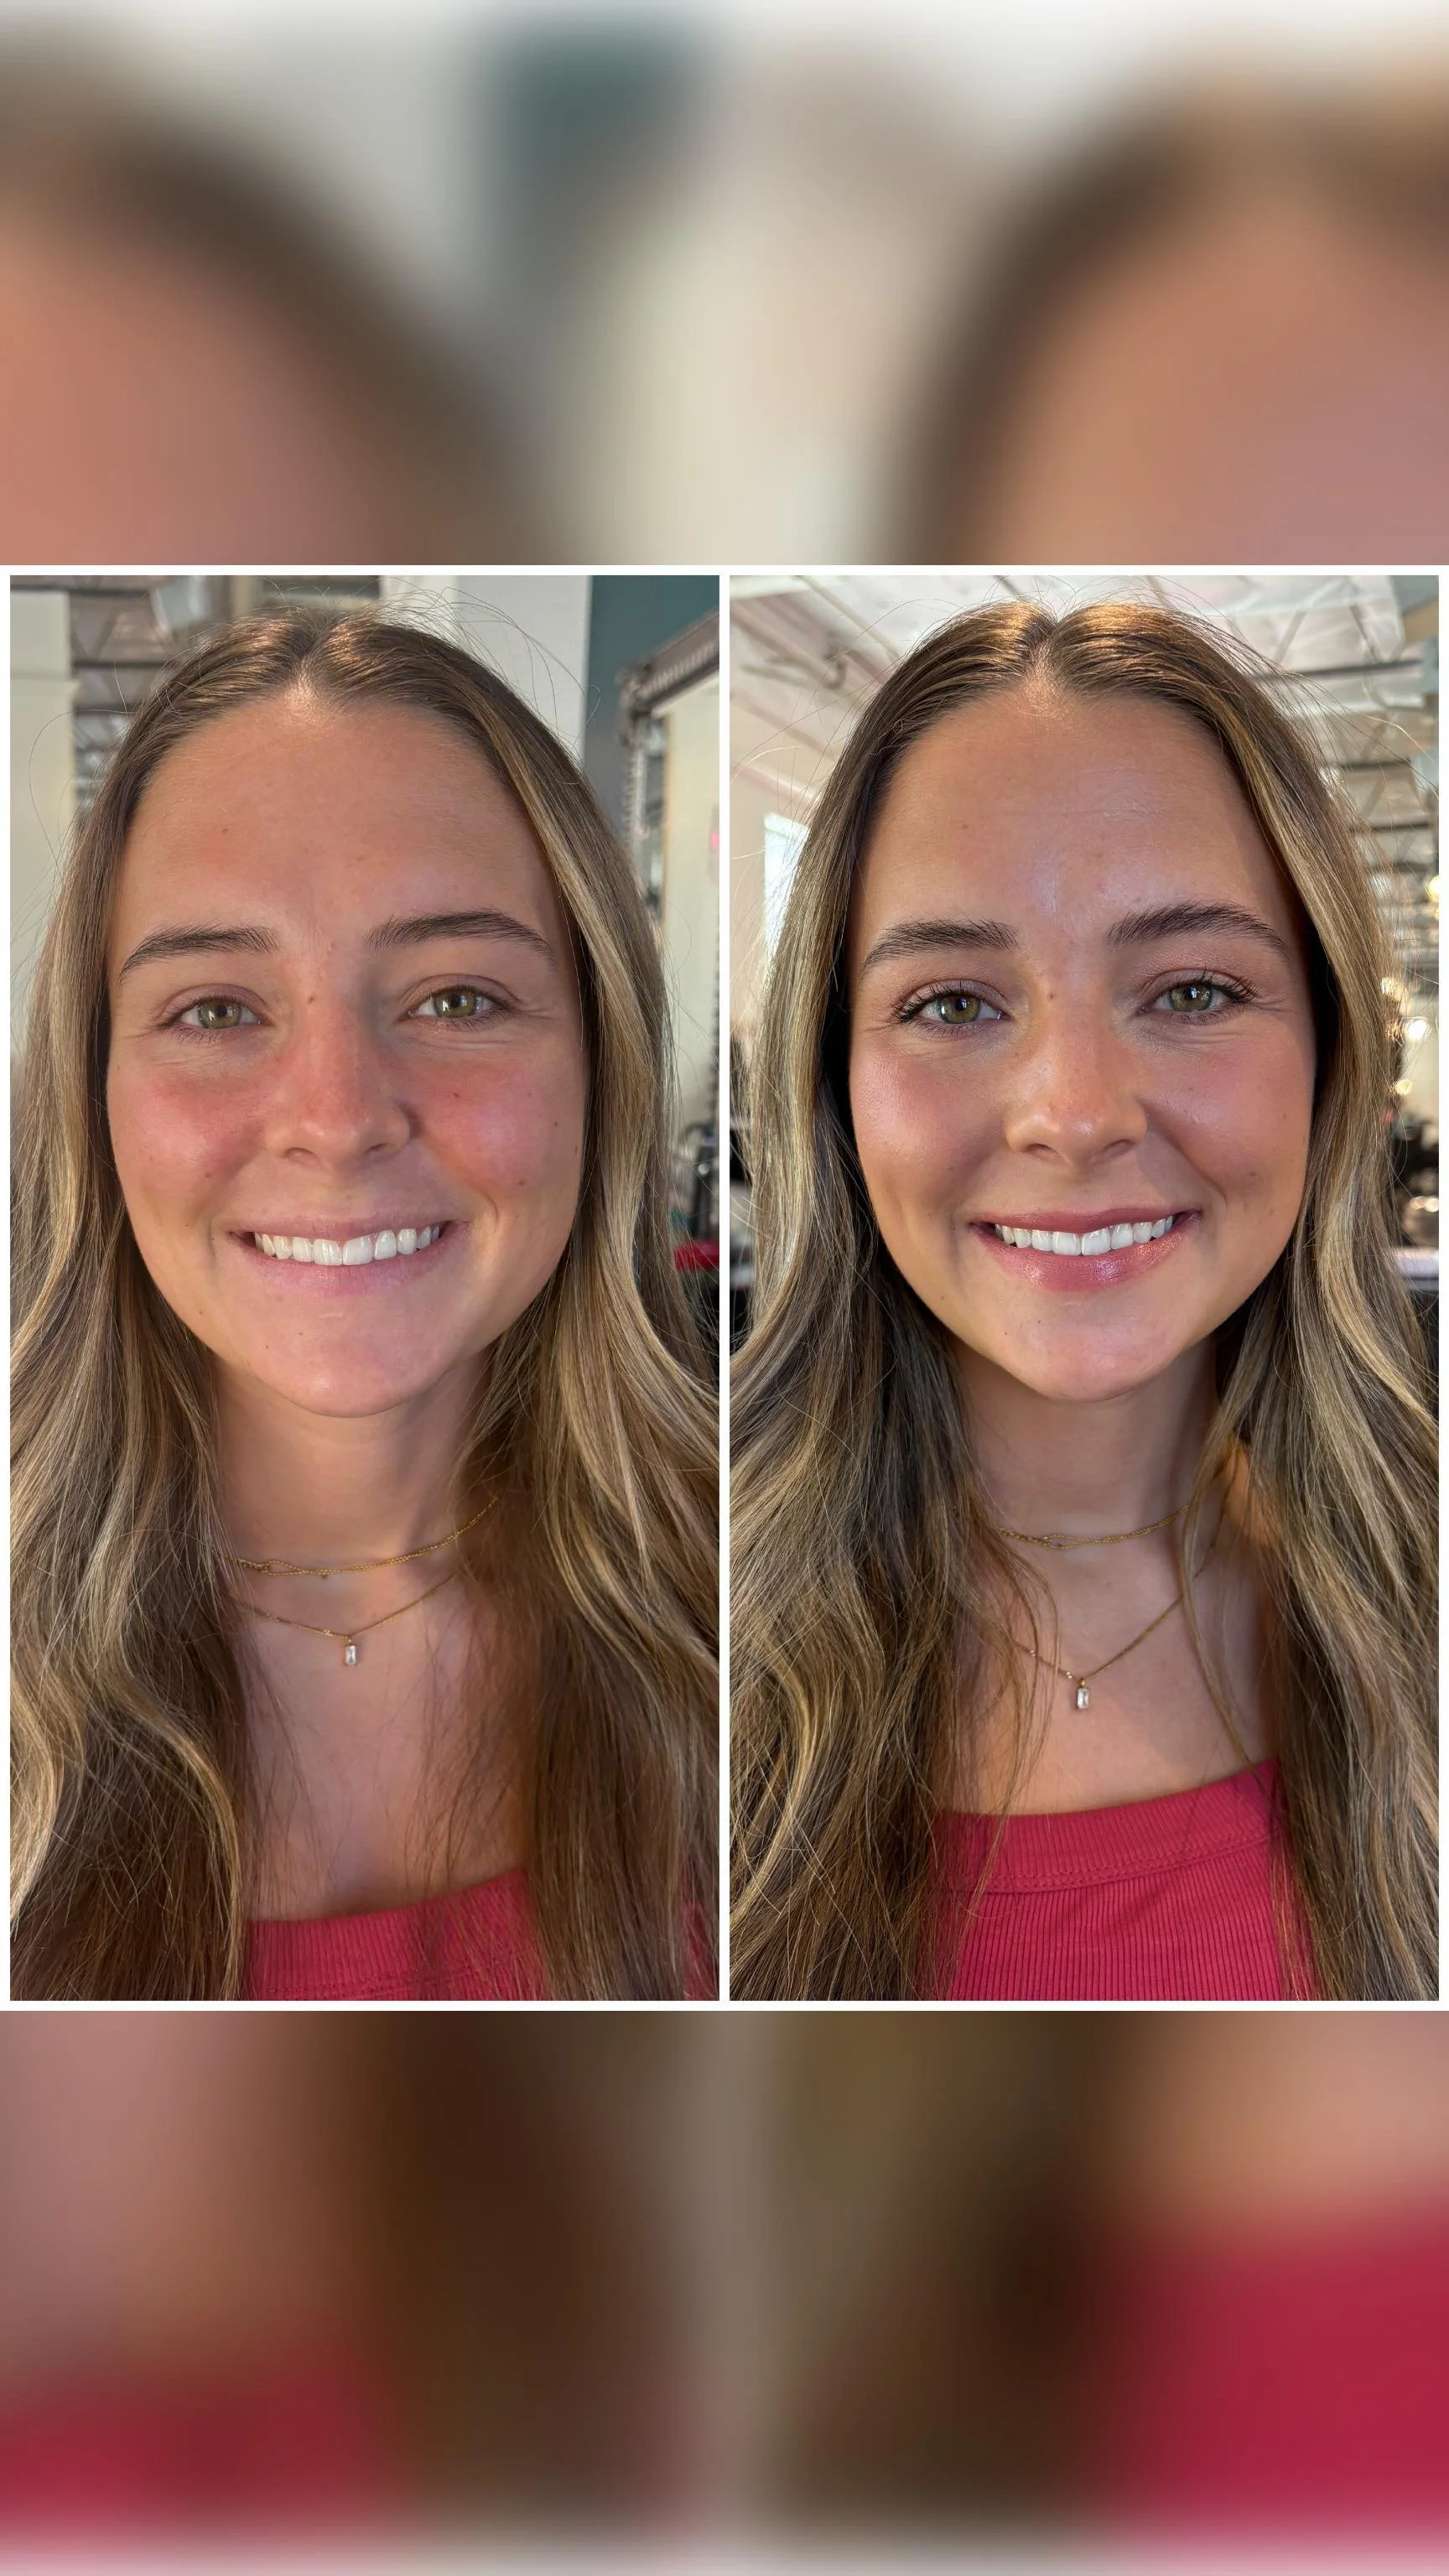
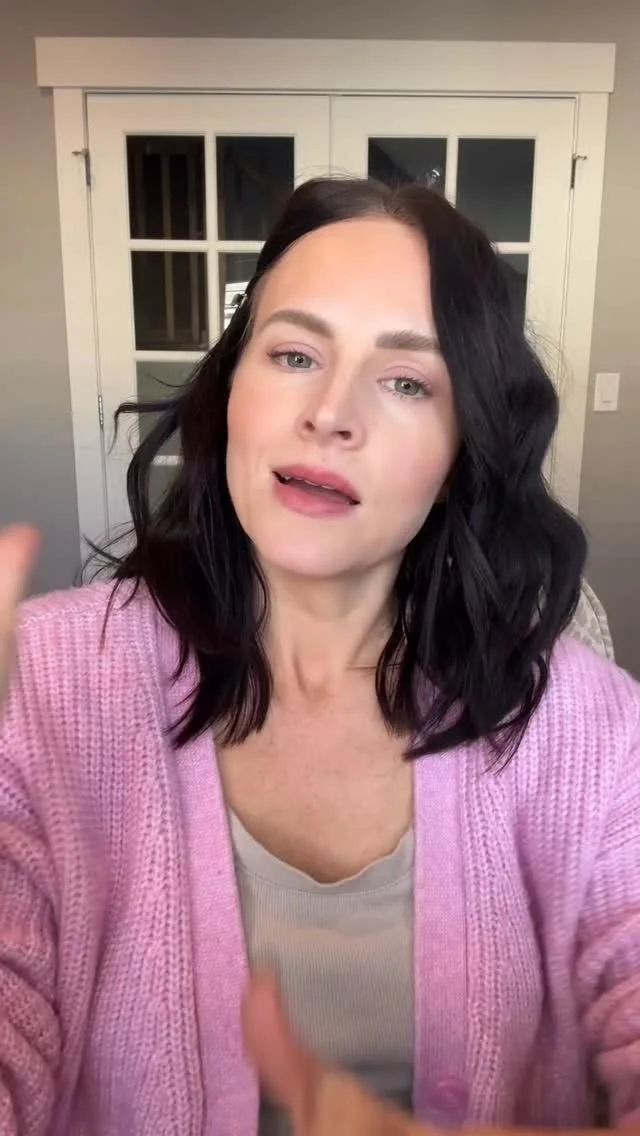
Dying your eyebrows at home is easier than you might think, and this post will teach you exactly what to do to get a professional look in under 10 minutes. [Video]
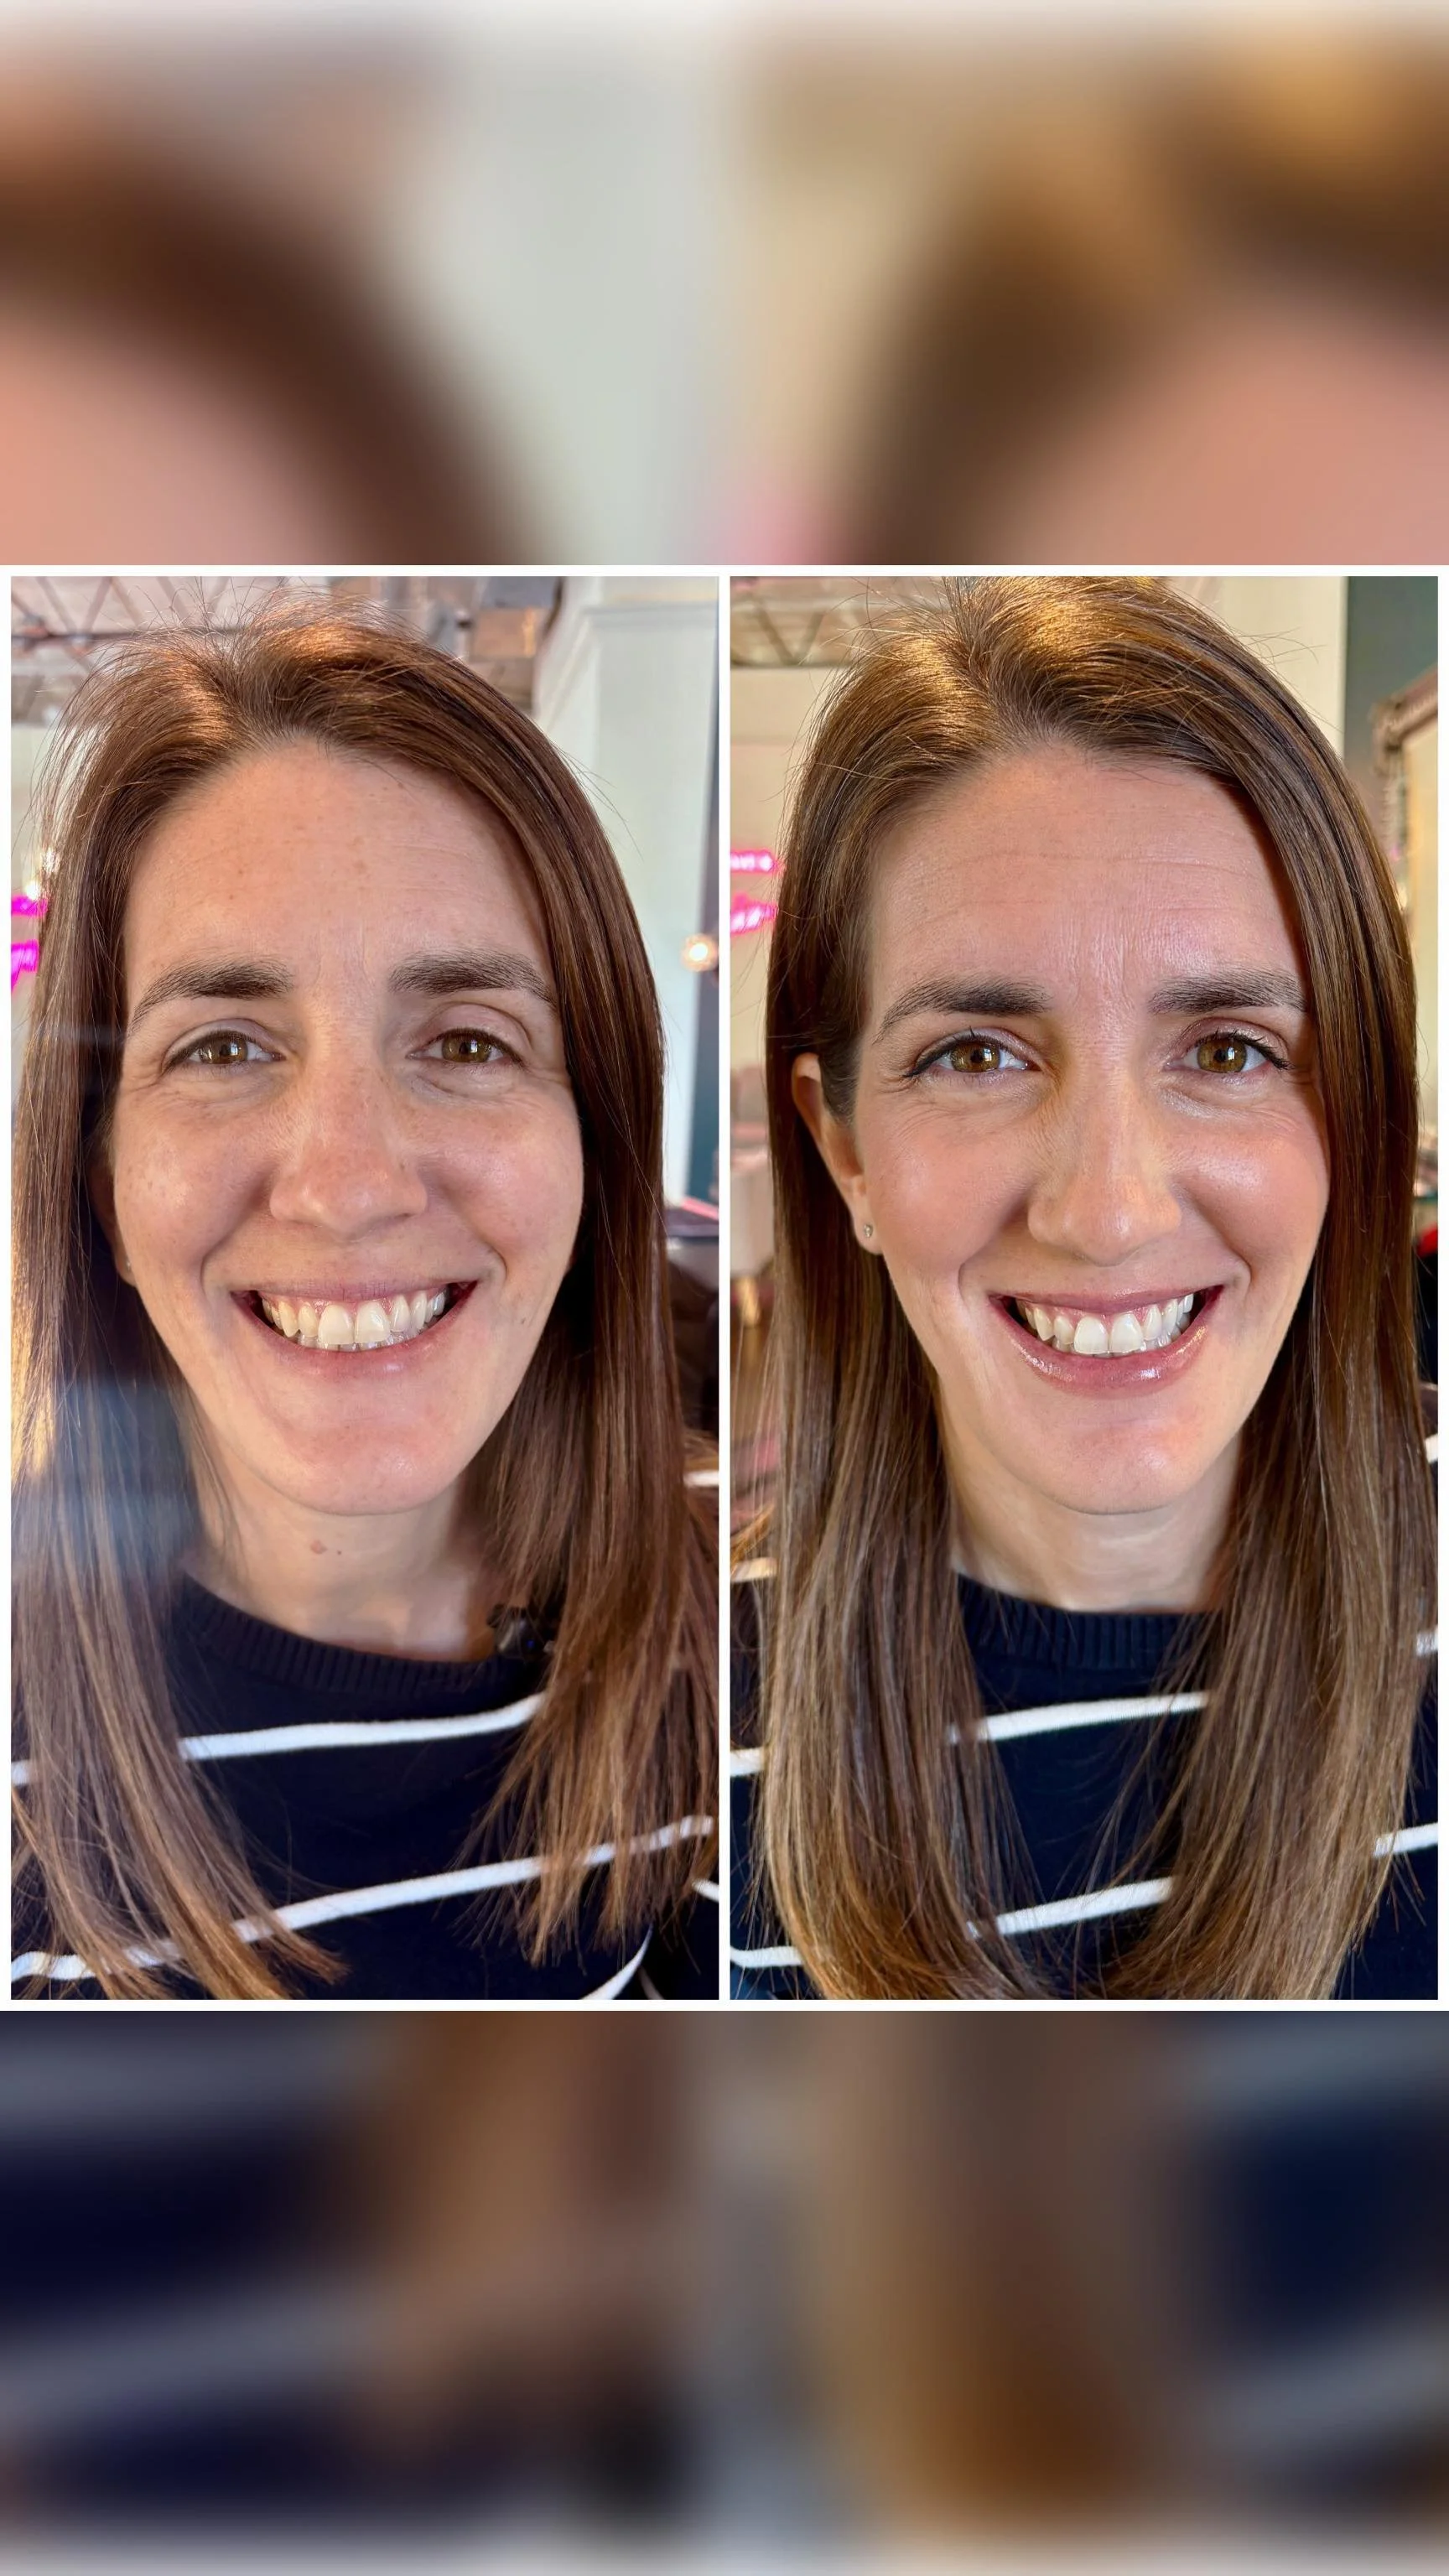
DIY Brow Tinting

  • Use a store bought Root Touch Up Kit by Clairol, and opt for an Ash tone which will appear more natural. 6A is ideal for blonde brows, 5A is great for medium brown, and 4A is best for very dark brown or black. Typically I recommend a 5 minute process time for the Clairol, but start with 3 minutes to determine how dark you want your final results.

  • If you've got very corse brow hairs, or grey in your brows try Just for Men Mustache and Beard Tint and process for about 3 minutes. The Light-Medium, Medium Brown, and Medium-Dark Brown will be the best colors to use on brows.

  • Opt for a color that is AT MOST 2 shades darker than your natural brows

  • Mix the color following the ratio described in the directions which is 1:1 parts color to developer, but remember you'll only need a small amount, about the size of a pea for each part.

  • Apply a layer of Vaseline around the brows first to protect the skin from the dye using a Q-tip.

  • Use a cheap makeup brush to apply the color to the hairs in light upward strokes. Avoid pressing firmly onto the skin... we are tinting the HAIRS, not the skin.

  • Remove any stray dye from the skin with a clean Q-tip.

  • Time for 3-5 minutes, and wipe off using a warm washcloth and shampoo, or a makeup remover wipe. If you applied the right brow first, remove the right brow first as well.

  • Assess the color and repeat to darken the color if necessary.

Typically I recommend tinting every 4 weeks to maintain your color, and one box of dye should last you 8-10 applications. I hope you'll give it a try, let me know if you have any questions below! xo

EASY MOM-HAIR STYLES FOR SUMMER

You've all heard the phrase... 'mom-hair', and it's usually accompanied with a negative connotation. And while I love to rock a 4-day-old messy top knot, just like the best of em, I also appreciate a style that's put together and chic.

Here are a few of my favorite quick ways to update classic mom-hair looks [Video]

  • The Polished Pony- ditch the sleek pulled tight look, and opt for a soft relaxed pony with loose curl. Part the hair in a U-shape starting from the top of the crown, down to each ear. Section the front off, while you secure a nice high pony with the hair behind the part line. Then loosly gather the front hair and sweep it back gathering it just over the elastic. Twist the section two times and lay the twist over the elasitic- secure with a couple bobby pins and fluff for volume.

  • The Twisted Top Knot- take your top not to a whole new level by adding a rope twist. Not sure how to rope twist? Check out my handy illustration here. It gives the look of a fancy braid, but only requires a few extra minutes.

  • The Double Up Half Up- make your half-up style twice as nice by pairing two twists together. Start by securing two sections from near the temples, swept back to the center. Flip the tail inward towards the head two times to make a twist. Fluff and pull apart the twists for more volume and texture. Repeat the step with two additional sections directly below the first for a layered look.

What's your go-to style in the Summer? Hope you'll try one of these too, xo

Follow on Bloglovin

SNOOP DUPE: LUXURY FACE CREAM UNDER $30

I LOVE skincare... and as such I've been known to spend a pretty penny on all sorts of creams, lotions, cleansers and more! In fact if my husband knew how much money I've spent over the years on my skincare alone, he'd probably have a heart attack!

Lately I've been noticing a trend in moisturizing cream; LUXURY

There has been so much buzz over these super

riche cremes

[french spelling = fancy], but you have to wonder is it worth the cost or are there dupes out there that perform just as well? Read on to find out.

  • Sisley Paris Sisleya Anti-Age Cream- $525 [1.6oz] This stuff is literally the creme de la creme! IMO it's better than La Mer, it's the ultimate luxury creme, and carries the price tag to prove it. The Sisleya has a super fresh scent, with an herbal undertone. It reminds me of a spa treatment in a jar. I especially love the hydrating and plumping action I get on my lips and eyes with this one. And the size of the jar is really decent for the price. If you are looking for a major indulgence that leaves the skin looking glowy and plump, then this is your guy.

  • Charlotte's Magic Cream- $100 [1.7oz] *shown above in the .52 intro size* Magic Cream has had MAJOR love all over the internet, mostly because of Charlottes' celebrity clients and models that all swear by it! This one has the most 'blurring' effect on the skin, and is great to apply just prior to your foundation. It has a more floral scent with a hint of SPF smell in there... even though it doesn't actually contain sunscreen. It does leave skin smoothed and glowing as promised.

  • Pixi Glowtion Day Dew- $22 [1.18oz] If you are looking for a little more bang for your buck, reach for the ultimate dupe to those mentioned above. The Pixi Glowtion has the exact same texture and richness to both higher end luxury creams, with the only exception being a bit of a luminous pearl sheen added. This adds to its 'glow factor' but in no way looks too shimmery. The scent on this one is identical to the Sisley Paris cream, and the pump bottle is actually preferred to the tub method. I reach for this one WAY more often then my expensive creams, simply because it works and I am not worried about using a hefty dose when I know I can repurchase easily.

Do you buy luxury creams? Do you think it's worth the cost?

Let me know in the comments below, xo

Follow on Bloglovin

!function(d,s,id){var e, p = /^http:/.test(d.location) ? 'http' : 'https';if(!d.getElementById(id)) {e = d.createElement(s);e.id = id;e.src = p + '://' + 'widgets.rewardstyle.com' + '/js/shopthepost.js';d.body.appendChild(e);}if(typeof window.__stp === 'object') if(d.readyState === 'complete') {window.__stp.init();}}(document, 'script', 'shopthepost-script');

JavaScript is currently disabled in this browser. Reactivate it to view this content.

BEST BLOW DRYERS FOR EVERY BUDGET

Using a nice blow dryer is comparable to driving the ultimate luxury car. And if you've been driving a rusty old hatch-back Honda around, you know exactly what I mean!

So what exactly is a good blow dryer?

Here is my criteria:

  • Powerful Motor

  • Light Weight yet Sturdy

  • Quiet

  • Dries the hair in under 10 minutes (15 for super long or thick hair)

  • Uses Ionic or Tourmaline Technology

  • Lasts a Minimum of 5 Years

If your dryer doesn't meet ALL of the criteria- you could be driving a rust bucket. And there are better alternatives out there for you. I've rounded up my top picks at every budget, so ladies (and gents) meet your new Cadillacs: [

video

]

  • Splurge- Harry Josh Pro Dryer $300 This is the dryer I use every day at the salon. It's Italian motor has a 15 year life span and it's powerful while being super compact. It has a 9 foot long cord which is awesome, and settings to turn on and off the ION function. You want 'On' for smoothness, and 'Off' for more volume. Totally worth the investment, in my opinion.

  • High End- Solano SuperLite $159 Lightweight with multiple heat settings- this guy is great if you suffer from static hair. It uses ceramic and tourmaline technology to add shine and heat hair from over drying causing unwanted static.

  • Mid Range- Ultra CHI $79 Besides being super cute to look at, this dryer is a tried and true that has been around (and loved) forever. CHI pioneered the use of ceramic technology for better heat distribution without unexpected bursts of cool air. This one has a single setting on heat however, so it's best for those with thick and long hair that tolerates high heat well.

  • Budget Friendly- Conair Infiniti Pro $29 This dryer packs a punch with over 1800 watts of power- but at a super affordable price. I LOVE the nozzle on this one because it's super wide and expands the width of your brush all at once. It also has a cool shot button which is great for a shiny finish on your hair.

  • Best Travel- BaByliss Pro Nano $39 Mighty and mini... two things that describe me- and THIS dryer! :) It's perfect for travel and comes with all the bells and whistles of your full size dryer, including a nozzle and long cord.

Thanks for reading- happy drying! xo

Follow on Bloglovin

!function(doc,s,id){ var e, p, cb; if(!doc.getElementById(id)) { e = doc.createElement(s); e.id = id; cb = new Date().getTime().toString(); p = '//shopsensewidget.shopstyle.com/widget-script.js?cb=1463178171148?cb=' + cb; e.src = p; doc.body.appendChild(e); } if(typeof window.ss_shopsense === 'object'){ if(doc.readyState === 'complete'){ window.ss_shopsense.init(); } } }(document, 'script', 'shopsensewidget-script');

5 THINGS YOU SHOULD HAVE IN YOUR PURSE FOR MAKEUP ON THE GO

I'm a busy mom on the go- and that means I'm often found applying makeup in the car. I've gotten pretty skilled at it really... and I don't know if thats a skill I should be boasting about? Ha!

But today I wanted to share the

5 PRODUCTS

every woman needs on the go for that quick

5 MINUTE FRESHEN UP.

These are my tried and true favorites, and I know you'll love them to. They make a major impact with the least amount of time, and none of them require additional brushes or tools to apply. [

Video

]

  • Maybelline Age Rewind Dark Circle Eraser in 'Brightening Illuminator' for an instant lift to the eyes. Apply using the sponge tip applicator, then wait about 30 seconds before blending in with your ring finger.

  • Essence Make Me Brow in 'Blondy Brows' for a polished brow in seconds. Coat the brows and then smooth into place with the handy micro wand.

  • Mark. All Butter Now Lip Treat in 'Pop Tart' for color and hydration all in one sweep.

  • NYX Tres Jolie Gel Eye Liner in 'Brown' for a lash boost that doesn't have to be perfect. Focus on the outer corners of the eyes and smudge into the lash line for an easy enhancement.

  • Tarte Cheek Stain in 'Flush' for an instant pop of color that brings life to the face. Apply to the apples of the cheeks, then blend in with your fingertips for a dewey glow-on-the-go.

!function(d,s,id){var e, p = /^http:/.test(d.location) ? 'http' : 'https';if(!d.getElementById(id)) {e = d.createElement(s);e.id = id;e.src = p + '://' + 'widgets.rewardstyle.com' + '/js/shopthepost.js';d.body.appendChild(e);}if(typeof window.__stp === 'object') if(d.readyState === 'complete') {window.__stp.init();}}(document, 'script', 'shopthepost-script');

JavaScript is currently disabled in this browser. Reactivate it to view this content.

THE ULTIMATE LASH CURL GUIDE

One question I get asked a lot is, 'How do I curl stubborn lashes?’

Many women struggle to get their lashes to hold curl, and I feel your pain. My lashes are pretty much stick straight, but I have developed a 3-clamp technique that makes the world of difference. I hope you'll try it, and let me know what you think.

3 Clamp Technique for the Ultimate Lash Curl

  • 1- Clamp the lash curler at the base of the lashes as close to the skin is possible without pinching the skin. The angle of the lash curler should be parallel to the face, resting on the cheekbone.

  • 2- Slide the curler up the length of the lash, stopping half way- right in the middle of your lashes. Raise the angle of the curler about 30 degrees, so that the curler is sticking straight out from your cheekbone.

  • 3- Slide the curler out again to the tips of the lashes and clamp one final time, while the angle of the curler is raised 45 degrees, sticking straight out from the eye socket.

My favorite lash curler? This one here.

Thanks for reading, I would love it if you would share this post with anyone else who might struggle with their lashes too. xo

Follow on Bloglovin

JavaScript is currently disabled in this browser. Reactivate it to view this content.

NEW SPRING BEAUTY RELEASES TO GET EXCITED ABOUT

Spring time is always super exciting in the beauty world when new releases line the shelves at the store, and I get a chance to discover new favorites. Today I have a few goodies to share with you that I know you'll love too. [

Video

]

  • Say Hello To Sexy Legs- It's makeup for legs, and it's genius! Get a nice bronze glow, hide imperfections and rock that cute skirt with confidence. It washes off with soap and doesn't transfer on to clothes once dry.

  • Milani Moisture Lock Oil Lip Treatment- The perfect gloss... not too sticky, smells amazing, and treats dry lips with natural oils.

  • Bamboo Summer Sun Recovery Spray- Prep hair before you go swimming to protect it, then use this yummy leave-in again after shampooing to keep hair hydrated this Summer.

  • Pixi Glowtion Day Dew- OMG this is my new favorite moistuizer in a long time. It's got a rich texure, a spa-like scent, and a subtle shimmer that leaves the skin glowing.

  • Tangle Teezer Blow Styling Brush- A unique tool that speeds your blowdry without pulling or tugging on your hair. The special bristles wick water away and help to smooth the hair with their velvet type texture.

  • Cover FX Correct Click- Color correct with ease using these pigmented sticks designed to combat ailments like dark circles, redness, or dullness. They blend beautifully and work great under your foundation.

Have you discovered anything new this Spring that I should try? Let me know in the comments below. xo 

Follow on Bloglovin

!function(d,s,id){var e, p = /^http:/.test(d.location) ? 'http' : 'https';if(!d.getElementById(id)) {e = d.createElement(s);e.id = id;e.src = p + '://' + 'widgets.rewardstyle.com' + '/js/shopthepost.js';d.body.appendChild(e);}if(typeof window.__stp === 'object') if(d.readyState === 'complete') {window.__stp.init();}}(document, 'script', 'shopthepost-script');

JavaScript is currently disabled in this browser. Reactivate it to view this content.

SPRING 2016 HOTTEST NAIL COLORS

Tis the season for happy fingernails! This Springs' nail colors are so great- I am loving everything in the latest collections. The colors are fun and flirty and perfect to wear with any Spring outfit. Here are my top picks. [

video

]

Spring 2016 Hot Nail Colors:

Flamingo Pink:

Slate Green:

Barely Lilac:

Follow on Bloglovin

!function(d,s,id){var e, p = /^http:/.test(d.location) ? 'http' : 'https';if(!d.getElementById(id)) {e = d.createElement(s);e.id = id;e.src = p + '://' + 'widgets.rewardstyle.com' + '/js/shopthepost.js';d.body.appendChild(e);}if(typeof window.__stp === 'object') if(d.readyState === 'complete') {window.__stp.init();}}(document, 'script', 'shopthepost-script');

JavaScript is currently disabled in this browser. Reactivate it to view this content.

10 DAY HAIR REPAIR RECIPE

Spring time is the perfect season to click 'reset' on your hair and get a fresh start. The winter months often leave us with dry parched hair, and a need for a boost of moisture. I always reccomend a nice trim at the salon in Spring, but adding my 10 Day Hair Repair Recipe for even better results. 10 Days to Better Hair:

Day 1- Begin taking a Hair Supplement daily to repair from the inside out. 

Day 2- Shampoo with a protein based ShampooConditioner. Cool rinse after washing.

Day 3- Rest day... no washing or heat tools, instead use Dry Shampoo and refresh the ends with an Argan Oil

Day 4- Protein Treatment on the midshaft and ends of hair to strengthen and washing. 

Day 5- Rest day

Day 6- Scalp Treatment using a Scalp Brush and Scalp Elixir

Day 7- Rest Day

Day 8- Shampoo & Deep Conditioning Treatment

Day 9- Rest Day

Day 10- Scalp Treatment 

You'll see great improvement in just 10 days, but continue to repeat the regimen to see even better results in 30 days.

This regimen has been carefully crafted to give you just the right amount of protein and conditioning during each 10 day cycle.

Get more details in the video below:

Here is to healthy hair!

Follow on Bloglovin

JavaScript is currently disabled in this browser. Reactivate it to view this content.

GET BOUNCIER HAIR WITH THIS WEEKLY TRICK

Every now and then (once a week in fact) my hair just needs a major detox. There is buildup from dry shampoo, natural scalp oil, sweat, hair spray and more- that just needs to be gone!

While my regular shampoo does a pretty good job of ridding said buildup, I always reach for a detox shampoo to really get a good deep clean just one day a week.

What is a clarifying or detox shampoo?

Well its a shampoo with more gusto than typical shampoos, meaning it has more intense detergent designed to really break down everything clinging to the hair and scalp, and then wash that gunk away. They can be drying however because of the stronger ingredients, so only use them sparingly for best results.

How do you use a detox shampoo?

Pick one day per week to really focus on a deep cleanse in the shower, and replace your regular shampoo with the detox version. You may need to wash twice if you've got major buildup, and focus on the root area only. Be sure you rinse the hair very well, and follow up with a large helping of conditioner (on the ends only, not the scalp) to replenish lost moisture.

What will the results be?

Your hair will be lighter and bouncier, less weighed down, and your color will be brighter too!

Here are a few of my recommended detox shampoos:

Do you have a favorite detox shampoo I should try? Let me know in the comments below- and be sure you are following me on instagram (@beautysnoop) because my #30DaysOfGiveaways starts April 1st- you won't want to miss it!

Follow on Bloglovin

!function(d,s,id){var e, p = /^http:/.test(d.location) ? 'http' : 'https';if(!d.getElementById(id)) {e = d.createElement(s);e.id = id;e.src = p + '://' + 'widgets.rewardstyle.com' + '/js/shopthepost.js';d.body.appendChild(e);}if(typeof window.__stp === 'object') if(d.readyState === 'complete') {window.__stp.init();}}(document, 'script', 'shopthepost-script');

JavaScript is currently disabled in this browser. Reactivate it to view this content.

THREE NATURAL BEAUTY BRANDS TO LOVE

Why are women turning to Natural Makeup?

It's no secret that we as a society have realized that there are far too many chemicals in the things we eat and the put on our bodies. With time under our belts to study the harmful effects of these chemicals many of us are now turning to products that are made more naturally. It's always better to be safe than sorry when it comes to our health, and our makeup should be no exception.

Besides the makeup itself, these types of brands also tend to be cruelty free and use more eco-friendly packaging, which also appeals to a lot of women in todays world.

What are we giving up when we use natural makeup?

Most natural products are Paraben free, which is a preservative that is commonly used in beauty products to extend the shelf life. There has been some research that indicates parabens can cause health issues and side effects however, so choosing products without them may be better for our health. This does however mean that we need to replace the products much more often to keep them healthy on our shelves. Check the labels for expiration dates.

In parabens' place, many lines are now using food-grade preservatives, meaning they could actually be eaten (although that's not recommended, of course) to give a further level of protection when it comes to the chemicals we put on our skin. Take a look at the

Video

below for more details:

A few Natural Makeup lines that I reccomend:

Pacifica Beauty

100% Vegan and cruelty free with a great price point

Tarte Cosmetics

-

Uses mineral pigments and clays sourced from the Amazon

Pur Minerals

-

Uses sustainable and responsibly sourced natural ingredients

Do you have any natural beauty lines that you love? Let me know in the comments below. xo

Follow on Bloglovin

!function(d,s,id){var e, p = /^http:/.test(d.location) ? 'http' : 'https';if(!d.getElementById(id)) {e = d.createElement(s);e.id = id;e.src = p + '://' + 'widgets.rewardstyle.com' + '/js/shopthepost.js';d.body.appendChild(e);}if(typeof window.__stp === 'object') if(d.readyState === 'complete') {window.__stp.init();}}(document, 'script', 'shopthepost-script');

JavaScript is currently disabled in this browser. Reactivate it to view this content.

REAL LIFE: PERMANENT MICROBLADE BROWS

If you follow me on Instagram [@beautysnoop], you may have seen that I recently had my eyebrows tattooed using a semi-permanent technique known as Hair Stroke Microblading. I have been wanting to have my brows tattooed for years, but never had the courage to go for it.

But after years of contemplating, and of course LOTS of research on experts in my area who perform this type of service, I decided to take the plunge! Here is what you need to know, if you ever want to try it too:

There are two main ways to tattoo brows; one method is soft tap, which is performed by hand using small micro blades. The other is using an electric tattoo pen which is more similar to the types of tattoo guns used in body art.

I chose to go with the soft tap method because the results are slightly less permanent and will require yearly touchups. This seemed less scary to me, seeing as there would be some fading of the pigment... just incase I wasn't happy with it.

After you know what method you prefer, spend plenty of time researching the service providers in your area. For me that research was mostly done on instagram, meaning I followed several technicians for months to gauge the consistency of their work, and see many different before's and afters of patients. I was looking for custom results on each person, and not a 'stenciled' type appearance. I also was looking for someone that created brow shapes that appealed to my personal aesthetic.

Once I made a decision on my technician, it was s time for the big day! I ended up booking with (Sees patients in UT and AZ) and Melanie could not have been more wonderful to work with, she's highly recommended! Check out her instagram for some amazing results. Allure Artistry

The process starts with a numbing cream applied to your brows- it's similar to the types used at the dentist only in a topical form. This helps 'take the edge off' during the procedure. Next, you'll decide on a color for your brows. I brought a few pics on my phone of my normal day-to-day brows when I have makeup on them so she could see the shape and color I am aiming for.

Melanie used a ruler to determine the shape and width of the brows that would best suit my face, and together we tweaked the shape until it was a perfect fit.

Next the actual procedure started, and I am not going to lie... it was more intense than I expected. It hurts in an 'uncomfortable' way, more than a true 'painful' kind of way. The worst part for me was the sound, which is like a repetitive scraping and popping on the skin as the blade cuts through the first layers of skin.

The microblade is used to create small incisions in the skin in the shape of hairs themselves. Then the dye is wiped over the incisions so that as they heal, the dye will be embedded just under the skin. Again it isn't the most wonderful experience in the world, but it is certainly tolerable and worth the final results. You'll also go back for a touchup about 6 weeks after the initial service to fill in any spots that didn't take the dye, and to add some more detail hairs. Maintenance after that is usually once per year.

The healing process was about a week long. The first fews days my brows were very tender to the touch but did not bleed or puss at all, and I was able to return to work the very next day. After that they were slightly itchy as the the top layer forms a thin greyish scab. I was instructed to avoid picking, and to keep the brows moistened with Aquifer at night. After all the skin sloughed off, I was left with a nice rich color, which was about 30% lighter than the color on the day of the application. I have a few spots that need to be touched up at my followup, but not many at all.

Expect to pay around $450 for this type of service, with annual touchups closer to $200. The expense to me was worth it already, because I have brows that are now evenly spaced, much better shaped and colored, and I don't have to spend nearly as much time on my makeup anymore. I wake up with brows and that is amazing! If you've ever wanted to do this, do your research and then go for it, I am so glad I did.

Let me know if you have any questions in the comments below.

Follow on Bloglovin

GROW YOUR HAIR LONG IN HALF THE TIME

This blog started after years of working in the salon industry and hearing many of the same complaints or questions over and over again. Those common threads drove me to create a place where I can answer the 'cries of help' for a larger audience and share my knowledge with all of you!

One such complaint I still hear in the salon ALL THE TIME is; ‘My hair never grows!'

Well ladies there are several reasons why you feel like your hair won't grow, but there are also several ways to aide in the process and speed things along. So lets look at both sides of the story.

Your hair won't grow because:

1- Breakage at the ends

2- Lack of scalp stimulation and blood flow

3- Poor nutrition and vitamin intake

Three Ways to induce hair growth:

1- Limiting your heat tool usage is going to be number one for keep length on the ends and avoiding breakage. Opt for a maximum of 2 times per week using either a blow dryer or flat iron/curling iron. Which means you'll need to use your dry shampoo on non wash days, or opt to let hair air dry if you are washing more often. And on that note, be sure you are shampooing correctly (here is my guide on that) and protecting the ends with a heat barrier. I recommend Alterna Heat Protection Spray

2- Amp up the blood flow to your scalp to increase cell activity and turnover with scalp stimulation. This can and should be done two ways: with cold water rinses after shampooing, and with scalp massage/dry brushing. The first way is pretty self explanatory, but cold water will quickly bring blood to the surface of the scalp, as well is make hair appear shinier and less frizzy.

Next, you'll want to buy a scalp-friendly paddle brush and thoroughly massage the scalp with long brush strokes nightly on dry hair. (Once your hair has reached the desired length, you can maintain with massage sessions weekly) Avoid brushing through the lengths and ends of the hair, as this could cause breakage- ONLY focus on the scalp. And of course be carful not to scratch or injure the scalp. I recommend The Wet Brush or the Tangle Teezer. Also, be aware of how you sleep. Consistent pressure on the scalp will limit blood flow, so if you ALWAYS sleep in the same position, your hair on that side of your head will grow slower. Rotating throughout the night is ideal for hair growth reasons.

3- Add a hair growth vitamin into your daily nutrition. Good hair comes from within, so eating healthy and exercising are always great places to start. But taking a supplement designed to help hair grow will be a huge step in achieving your goal. These vitamins are packed with Folic Acid, Vitamin E, Biotin, and Coconut Oil to aid in the strength and luster of the hair. My favorite are SugarBearHair Vitamins.

Remember that hair grows on average 1/2 inch per month, but with these techniques you can see that double! Good luck, and let me know if you have any techniques in the comments below, xo

WEIRD BEAUTY PRODUCTS THAT ARE ACTUALLY REALLY COOL

Piper Wai Review, Hairgurt Review, Acne Light Mask Review, Boscia Black Masque Review

Who is that crazy JASON-looking person in the photo, you ask!?

Don't fret... it's me! And yes, I know I look ridiculous, but if you haven't figured that out by now, you need to spend some more time on my blog!

Today I am bringing you a look at some of

the WEIRDEST beauty products

I use and love! They are unique and exciting, plus they make my routine more fun. Check out the

video below

, and let me know if you have any weird products or tools I should try in the comments below.

Thanks for watching and reading, xo

Follow on Bloglovin

!function(d,s,id){var e, p = /^http:/.test(d.location) ? 'http' : 'https';if(!d.getElementById(id)) {e = d.createElement(s);e.id = id;e.src = p + '://' + 'widgets.rewardstyle.com' + '/js/shopthepost.js';d.body.appendChild(e);}if(typeof window.__stp === 'object') if(d.readyState === 'complete') {window.__stp.init();}}(document, 'script', 'shopthepost-script');

JavaScript is currently disabled in this browser. Reactivate it to view this content.

PERFUME OILS 101

What are Perfume Oils?

Simply put they are the Creme de la Creme of perfume, with the most concentrated amount of fragrance suspended in an oil base. The formulas don't contain any alcohol so they don't evaporate quickly like traditional perfumes do.

Instead

the oil is warmed by your skin

and releases fragrance throughout the day. The formula is rich and luxurious and makes me feel as though I am a delicate lady of a previous decade. (Sidenote: Have you seen the BBC Series, 'The Paradise'? I just binged watched the whole series, and these perfume oils are exactly what the ladies wore back then!) The

fragrance oils are intended to be placed on your pulse points

, and to be massaged into the skin- becoming part of the wearers essence.

This means that every scent will smell 

slightly different on each wearer, 

and the result is truly unique. 

Here are my favorite perfume oils, that are highly recommended (

video

):

  • The Blend by Fred Segal Custom Oils Buy one or more of your favorite individual notes, than layer them together for a completely custom fragrance. My top picks are 03 Vanilla, 07 White Tea, and 10 Citrus Zest. Check out these recipe ideas too!

  • Kai Perfume Oil The perfect 'Beach Vacay' scent filled with Gardenia and White Exotic flowers. Reminds me of Hawaii every time I put it on.

  • Inkling Scents This company makes small batch oil perfumes and has some amazing scents and packaging! I love the ink pot and feather quill display for a very lady-like experience. Favs scents include Unify and Sultry.

  • Diptyque Do Son If you've ever smelled a Diptyque candle, you know just how heavenly their scents are. But the perfumes steal the show- and the Do Son scent has beautiful rose and floral notes. The lasting power is great on this one, and the packaging is perf.

  • Nirvana White& Black Black is rich, warm and quite musky with notes of Vanilla and Candlewood. White is a lighter more feminine scent with notes of peony. Mary Kate and Ashley Olsen know a thing or two about mystery, and these scents are a perfect reflection of their styles.

Have you tried perfume oils yet? Let me know in the comments below, smell ya later!

Follow on Bloglovin

!function(d,s,id){var e, p = /^http:/.test(d.location) ? 'http' : 'https';if(!d.getElementById(id)) {e = d.createElement(s);e.id = id;e.src = p + '://' + 'widgets.rewardstyle.com' + '/js/shopthepost.js';d.body.appendChild(e);}if(typeof window.__stp === 'object') if(d.readyState === 'complete') {window.__stp.init();}}(document, 'script', 'shopthepost-script');

JavaScript is currently disabled in this browser. Reactivate it to view this content.

GARBAGE THAT I LOVE // EMPTIES

There's a certain satisfaction when you finish a product... but if its a product you love sometimes that satisfaction is followed by sadness too! It's always hard to say goodbye.

Here are my latest

Garbage Can Loves

, if you will. The Empties that I used and loved to the bitter end- and ones that I am certain you'll love too. Watch the

video

below for a peak into my tried and true favorites.

Products Mentioned:

Thanks for watching, let me know in the comments below if you have any empties that I should try!

Follow on Bloglovin

!function(d,s,id){var e, p = /^http:/.test(d.location) ? 'http' : 'https';if(!d.getElementById(id)) {e = d.createElement(s);e.id = id;e.src = p + '://' + 'widgets.rewardstyle.com' + '/js/shopthepost.js';d.body.appendChild(e);}if(typeof window.__stp === 'object') if(d.readyState === 'complete') {window.__stp.init();}}(document, 'script', 'shopthepost-script');

JavaScript is currently disabled in this browser. Reactivate it to view this content.

GIZMO SNOOP: SIGMA SPA BRUSH CLEANSING GLOVE

Cleansing your makeup brushes is a crucial

step that can often be forgotten or postponed too long. Skipping this vital step will not only cause your brushes to not last as long, but it will also prevent the best application of the products themselves. Not to mention the bacteria growth and possible skin irritations and acne that comes from smearing said bacteria all over your face. #AmIRight?

I've posted about

my favorite way to clean my brushes before

, but today I'm snooping out a fun new tool to aid in the process even further.

Sigma Beauty

makes these unique

cleansing gloves and sink mats

, that protect your hands from taking a beating while scrubbing, and they also help to get the job done quicker and more efficiently.

You should be cleaning your liquid/cream 

brushes every 2-3 weeks, and your powder brushes every 6-8 weeks. 

The gloves and mats are made from a high quality silicone that have many different textures built in.

The textured bits are designed to loosen dirt and makeup from your brushes

and then to help reshape the brush before it dries.

I love using this, and it really does make the job quicker and more fun, while saving my hands from getting to raw and dry. I have the

Express Glove

which works great but sometimes can be hard to get a handle on once things get slippery. Next time I buy,  I'll go for the

sink mat

which has suction cups and requires no hands at all!

So if you want to take better care of your brushes, I highly reccomend this gizmo! Thanks for reading, xo

Follow on Bloglovin

!function(d,s,id){var e, p = /^http:/.test(d.location) ? 'http' : 'https';if(!d.getElementById(id)) {e = d.createElement(s);e.id = id;e.src = p + '://' + 'widgets.rewardstyle.com' + '/js/shopthepost.js';d.body.appendChild(e);}if(typeof window.__stp === 'object') if(d.readyState === 'complete') {window.__stp.init();}}(document, 'script', 'shopthepost-script');

JavaScript is currently disabled in this browser. Reactivate it to view this content.

REAL LIFE: SHIRODHARA TREATMENT

As an avid spa-goer I am always looking for unique treatments to try- and the

Shirodhara

is one that I have wanted to experience for years but never had the opportunity. Until now!

I was lucky enough to have a

Canyon Ranch Spa

onboard my cruise ship recently, so I took the opportunity to embark on a spa adventure that I am excited to share with you.

Canyon Ranch has many beautiful locations

and is well known for its' celebrity clientele and upscale services. The cruise ship versions of the spa was equally beautiful and offered all of the spas signature treatments.

First of all, you might be asking

what is a Shirodhara treatment anyway

? It's a relaxation-focused treatment that has been used for thousands of years in India. The Ayurveda technique traditionally uses warm herb-infused oils on the skin and hair, and let me tell you- it's like a little taste of heaven!

The experience starts out similar to a massage or a facial- where you lie face up on a table (either a massage table or a specially designed table that has a trough system near the head that drains the oil). Typically you'll be in a darkened room, with relaxing scents and music surrounding you, which is wonderful in and of itself!

Your head is tilted back slightly, usually over a rolled towel to aid in the process and avoid oil making it's way down your face. The technician will then began

a small stream of warmed oil dripping from a specially designed pot

, that is hung a few inches above your head. The stream of warm

oil will hit your 'third eye' or the center of the forehead

, and drip its way back into your hair and scalp.

The warm oil is designed to promote healthy blood flow to the face and scalp

, which will relax the muscles and nerves almost instantly. I felt as though my senses were heightened and I could really FEEL the oil make it's way past every nerve ending on my scalp. For those of you who love having your hair washed at the salon, this is like the version dreams were made of.

"I could really FEEL the oil make it's way past every nerve ending on my scalp"

For about 20 minutes the oil stream slowly drips over your head, but you'll wish it never stopped! Once the oil does stop running, your scalp will tingle with a cooling sensation that is also refreshing and energizing.

The technique is said to relieve headaches and tension

, as well as boost energy.

Next, your therapist will massage the oil into the scalp and hair for another 20 or so minutes... again heaven. Depending on the practice of the particular spa you are at, you may also get an arm and foot massage while the oil soaks into your hair.

After the treatment is over- you'll be a greased up ball of relaxation. Some people choose to leave the oil in the hair for a few hours, while others will want to shower right away. (I showered FYI, and needed several helpings of shampoo to rid all of the oil out of my hair)

I felt very relaxed throughout the day following my Shirodhara, and I didn't have a single headache during my cruise, which is very rare for me! Although I am sure being in a stress free environment helped a little with that too!

Overall I loved my experience, and would definitely do it again. If you have the chance- try it at least once. xo

Follow on Bloglovin

PAINT THE TOWN WITH THESE NAIL COLORS

Winter 2016 is all about

moody colors that are rich in pigment

when it comes to nail polish. The look is chic and sophisticated, and acts as the perfect Winter accessory.

I've rounded up my favorite colors from brands that I trust and use the most. I'm currently wearing the Ciate blue pictured above, and get so many compliments on the shade! I know you'll love it too.

What colors are you loving right now? Let me know in the comments below, xo

Follow on Bloglovin

!function(d,s,id){var e, p = /^http:/.test(d.location) ? 'http' : 'https';if(!d.getElementById(id)) {e = d.createElement(s);e.id = id;e.src = p + '://' + 'widgets.rewardstyle.com' + '/js/shopthepost.js';d.body.appendChild(e);}if(typeof window.__stp === 'object') if(d.readyState === 'complete') {window.__stp.init();}}(document, 'script', 'shopthepost-script');

JavaScript is currently disabled in this browser. Reactivate it to view this content.

3 NEW WAYS TO CURL YOUR HAIR

I'm always striving to come op with fun new ways to style my hair. After all, 13 years in the beauty industry can get a little repetitive...

Today I am sharing a few

new ways to use your heat tools

, they are creative and a little bit out-of-the-box. Each way will produce a curl, but hopefully they are curls you have seen or tried yet.

Take a look at the video below for your

lesson in creative curling

. [PS- this episode of Studio5 was filmed in front of a live studio audience, which was SO exciting and fun. The energy was fantastic! As part of the fun, I was able to pluck three ladies from the audience, whom I've never met and ask them to join me on TV! They were such great sports and I had so much fun meeting them, so thanks ladies- you all look gorgeous.]

1- 

The Mermaid Curl

Using a 1 inch wand or curling iron, twist wrap the hair in horizontal sections to develop ribbon curls with a twist that are slightly undone and not uniform. This produces an 'off duty' looks that is casual and relaxed. Practice the wrap technique by first looking at your 'pulse', then twist your wrist to look at your 'watch' before wrapping around the wand, and repeat to the end of the strand. [using 25mm wand form

Nume

]

2- The S-Wave

Using our flat iron, take thin horizontal sections and guide them into an 'S-pattern'. Tap the flat iron over the shape to heat it through, and then use clips to secure the wave while it cools. Repeat in the opposite direction to the end of the strand. The result is a vintage type finger wave look that is great for a formal night out. [using Megastar flat iron from

Nume

]

3- The Bantu Curl

Section hair into 2 inch triangle sections, and apply heat with the flat iron to heat the section through. Twist the hair into small buns around the head, and secure the ends with a booby pin. After cooling, release the buns to reveal bouncy textured curls that resemble natural curl.

Thanks so much for reading and watching, see you all soon!

Follow on Bloglovin